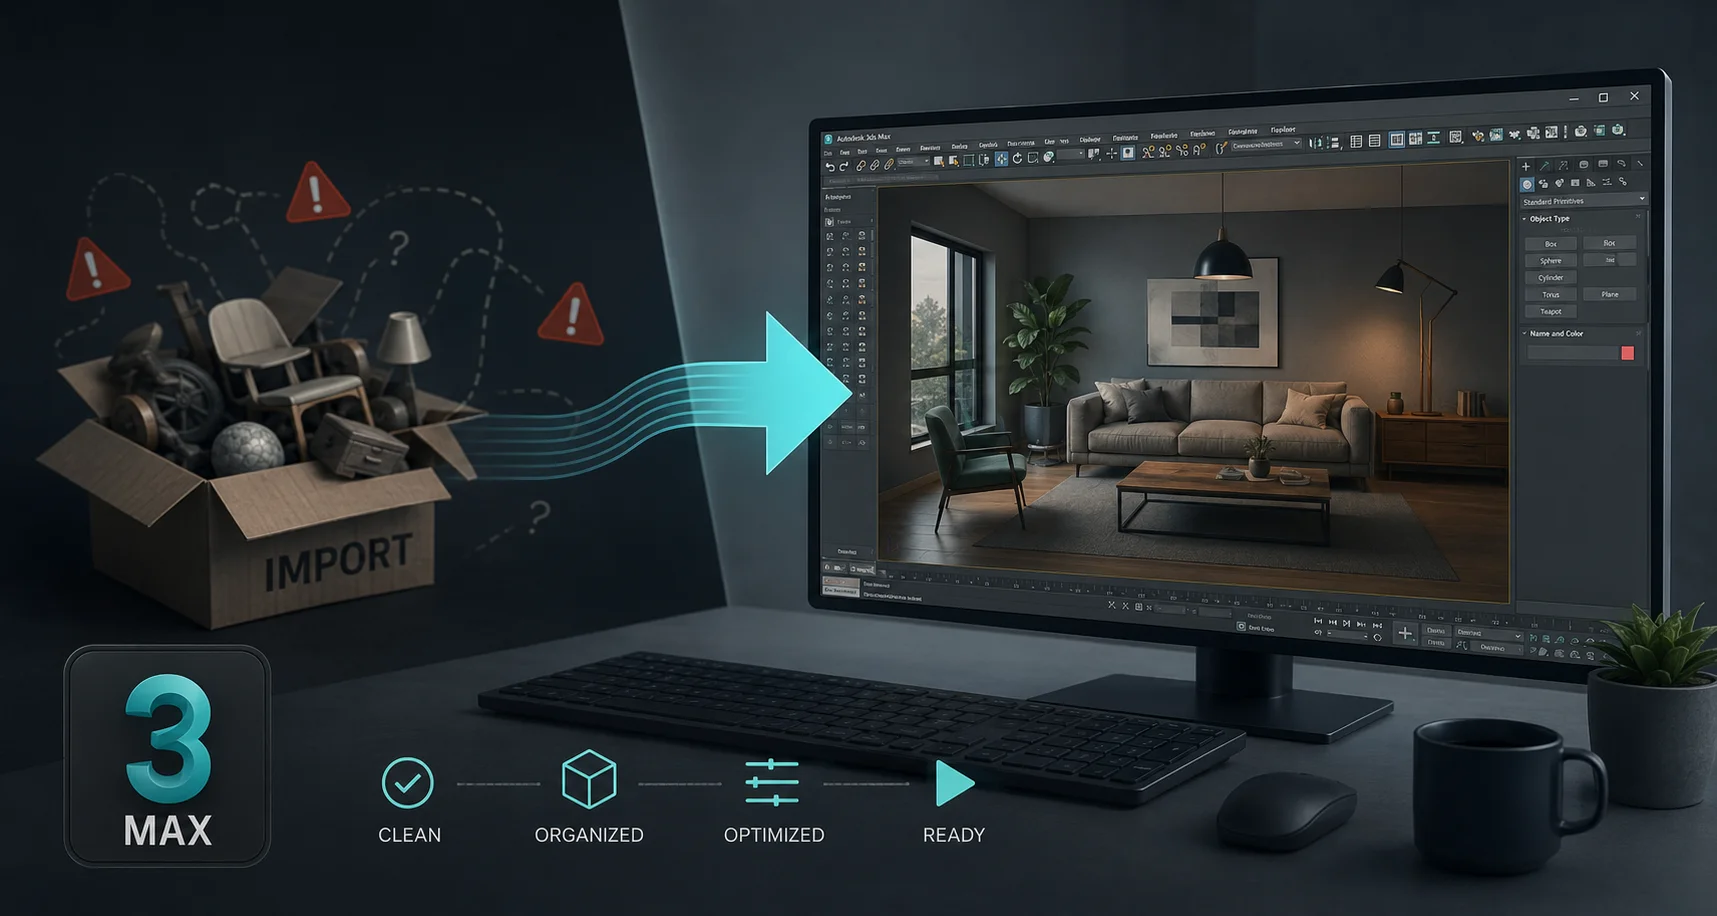
If you work in 3DS Max long enough, you develop a kind of dread around the Import menu. Not because importing itself is hard, but because of what tends to happen afterward. You bring in a chair model for your interior scene, and instead of a chair, you get a grey mannequin sitting in your viewport, surrounded by error messages about missing bitmaps, at a scale that suggests it was modeled for ants or for a building.
This isn't a 3DS Max problem exactly. It's more that 3DS Max sits at the center of the architectural visualization and product rendering world, where V-Ray and Corona are the dominant renderers, and most asset libraries were never built with those specific material systems in mind. The result is a gap between "the file imported successfully" and "the asset actually looks right," and that gap is where most of the wasted time lives.
This guide walks through closing that gap properly, covering the import settings that matter, the material rebuilding process for both V-Ray and Corona, and how to set up a workflow where this stops being a recurring problem on every single asset.
Why 3DS Max Import Problems Feel Worse Than Other Software
Part of this is genuinely about how 3DS Max handles incoming data compared to something like Blender or Unreal Engine, but a lot of it comes down to the kind of work 3DS Max artists do.
ArchViz and product visualization work is judged almost entirely on how convincing the materials and lighting look. A chair with slightly wrong topology might go unnoticed in a final render. A chair with the wrong material setup, flat grey, missing reflections, wrong roughness, will look obviously fake even to a non-technical client. The bar for "good enough" materials is higher in this kind of work than almost anywhere else in 3D.
At the same time, V-Ray and Corona materials are specific node setups that don't exist in FBX or OBJ files. When you import a generic asset, you're getting generic Standard or Physical materials at best, and those need to become VRayMtl or CoronaPhysicalMtl materials before they'll behave correctly under your lighting setup.
Add in the fact that 3DS Max defaults to inches or generic units depending on how it was set up, while a huge amount of asset content online assumes centimeters or meters, and you've got the three classic problems stacking on top of each other: wrong scale, wrong materials, and missing textures, all at once, on basically every import.
A few minutes of attention before you import saves a lot of cleanup afterward.
FBX remains the most common format you'll find for general assets, and it's reasonably reliable for geometry in 3DS Max. The catch is entirely on the material side: FBX materials come in as Standard or Physical materials with no V-Ray or Corona setup at all.
OBJ is fine for geometry-only situations but brings even less material information than FBX. If you're planning to build materials from scratch anyway, OBJ's simplicity isn't a downside.
3DS Max native files (.max) are the ideal, obviously, but they're rare outside of platforms that specifically cater to ArchViz workflows. When available, they save the entire material rebuilding step because the source artist already set things up in V-Ray or Corona.
GLTF support in 3DS Max exists through plugins rather than natively, and isn't as commonly used in the ArchViz world as it is in game development. For most 3DS Max artists, FBX remains the practical default despite its material limitations.
The honest reality is that for most sources, FBX is what you'll be working with, which means the material rebuild step described later in this guide is something most 3DS Max artists do regularly, whether they've formalized the process or not.
Import Settings That Actually Matter
Importing FBX Into 3DS Max
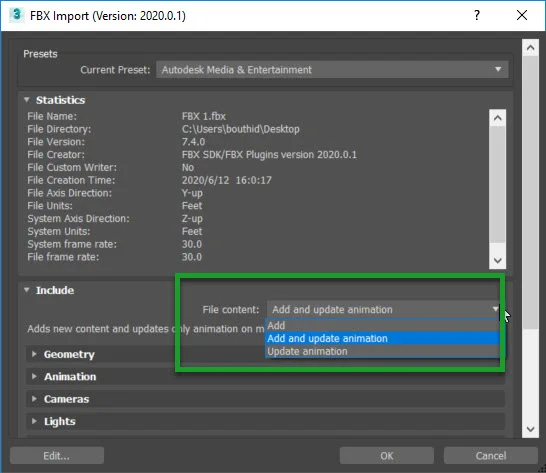
Go to File > Import > Import and select your FBX file. The FBX import dialog that appears has a handful of settings worth checking every time:
Units is the first thing to look at. Under the Units section of the import dialog, you'll see options for automatically converting based on the file's stored units, or manually specifying a conversion. If your scene is in centimeters (common for ArchViz) and the FBX was exported in meters (common from Blender and many marketplaces), an asset that should be 90cm tall will come in at 9000cm if the conversion isn't applied. Setting the conversion explicitly here, rather than relying on automatic detection, avoids the most common scale disaster.
Geometry options include "Smoothing Groups" and "Turbosmooth," which control how the imported mesh handles smoothing. For most furniture and prop assets, keeping the original smoothing groups from the file gives the best result without extra steps.
Cameras and Lights can usually be left unchecked unless you specifically want the source file's camera setup, which for asset imports is rarely useful and just adds clutter to your scene.
After importing, before doing anything else, select the imported object and check its dimensions in the Object Properties or via the Measure tool. If a chair shows up as 9000 units tall, you know immediately it's a units issue rather than a modeling issue, and you can fix the scale globally (Customize > Unit Setup, or rescale the object) rather than chasing a phantom modeling problem.
Importing OBJ Into 3DS Max
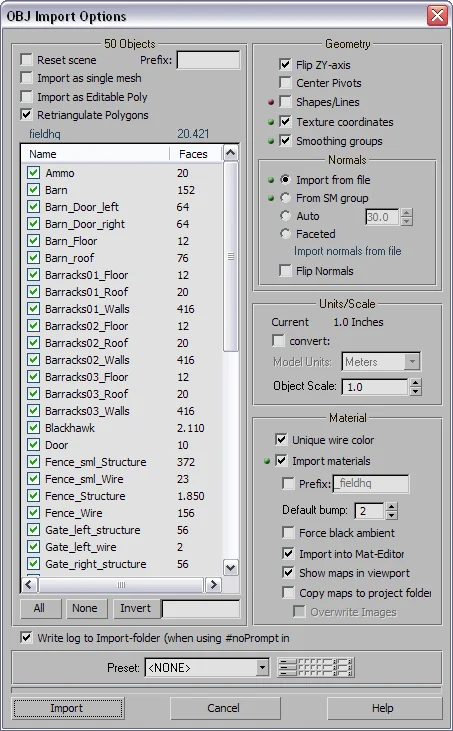
OBJ import in 3DS Max is more straightforward and generally has fewer surprises. Go to File > Import > Import, select OBJ, and the default settings usually bring geometry in cleanly. The companion MTL file, if present, assigns basic material names and sometimes diffuse colors, but nothing close to a render-ready setup.
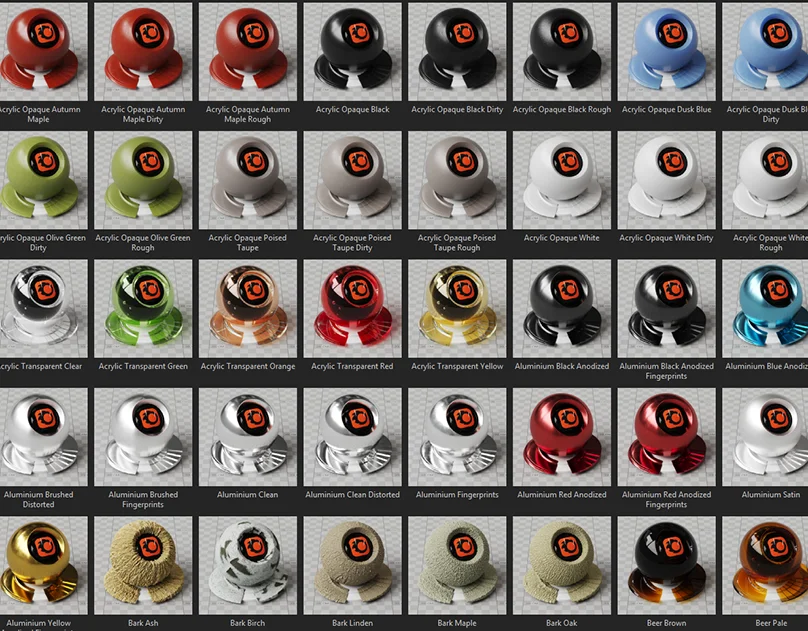
Rebuilding Materials for V-Ray

This is the step that determines whether your imported asset looks like it belongs in your scene or looks like a placeholder.
When an FBX imports, its materials typically land in the Material Editor as Standard or Physical materials, often named generically like "Material #1" or named after the original file's material slots. The textures, if they came along, are usually still referenced and just need to be reconnected to the right slots in a VRayMtl.
The conversion process, material by material:
Create a new VRayMtl in the Material Editor or Slate Material Editor.
Take the diffuse/albedo texture from the imported Standard material and plug it into the VRayMtl's Diffuse slot.
If a roughness map exists, it typically needs to be inverted to work as a Reflection Glossiness map in V-Ray, since roughness and glossiness are inverse concepts. V-Ray's Output map with the "Invert" option checked, placed between the texture and the Reflection Glossiness slot, handles this.
A normal map goes into the Bump slot, with the map type set to "Normal Bump" rather than a standard bump map, which is a common mistake that results in flat-looking surfaces despite having a normal map connected.
For metal surfaces, the Metalness map (if provided) influences how much of the Reflection color comes from the diffuse texture versus a neutral reflective value. V-Ray's material setup for metalness workflows has improved significantly in recent versions, and using the Metalness slot directly (available in newer VRayMtl versions) is more accurate than manually faking it with reflection color adjustments.
Rebuilding Materials for Corona
The process for Corona follows the same logic with different slot names. Create a CoronaPhysicalMtl, connect the diffuse texture to the Base Color slot, connect roughness (Corona uses roughness directly, no inversion needed, which is one less step compared to V-Ray's glossiness-based workflow) to the Roughness slot, connect normal maps to the Bump slot with Normal Map mode enabled, and use the Metalness slot for metal surfaces directly.
Corona's more straightforward roughness handling (versus V-Ray's glossiness inversion) means Corona material rebuilds are often slightly faster once you're used to the workflow, though both renderers get you to the same visual result with correctly connected maps.
The Texture Path Problem and How to Actually Fix It
Missing texture errors are one of the most common 3DS Max import issues, and the fix most people reach for, manually browsing to each missing file one by one, is also the slowest.
3DS Max has a built-in tool for this that's underused: Asset Tracking (under References > Asset Tracking, or in some versions accessible via the Bitmap/Photometric Path Editor under File > References). This shows every file path referenced in your scene, flags which ones are missing, and lets you redirect them in bulk.
The faster approach: before importing, copy all the asset's texture files into a single folder, then after import, use the Asset Tracking tool to point 3DS Max at that folder once. If the textures use consistent relative paths, 3DS Max will often resolve all of them at once rather than requiring you to browse to each file individually.
For ongoing work, setting up a consistent project folder structure using Customize > Configure User Paths and pointing 3DS Max at a dedicated textures directory for your project means future imports are more likely to resolve automatically, since 3DS Max checks configured paths before reporting files as missing.
Building a Library of Pre-Converted Assets
The material rebuilding process described above is the single biggest time cost in a typical 3DS Max import, easily ten to twenty minutes per asset depending on complexity. The way professional ArchViz studios deal with this isn't by getting faster at the conversion, it's by doing the conversion once per asset and never again.
The practical version of this: every time you import and convert an asset, save it as a 3DS Max scene file (or merge it into a library .max file containing multiple converted assets) with the V-Ray or Corona materials already set up. The next time you need that asset, you use File > Merge to bring it in from your library file, and it arrives with materials intact, no FBX import, no material rebuild, no texture path issues.
Over months of work, this builds into a personal library of assets that are genuinely faster to use than sourcing fresh ones every time, because the one-time conversion cost has already been paid. Many studios maintain shared library .max files on a server specifically for this reason, so the conversion work done by one artist benefits the whole team.
Where Korvix3D Removes This Entirely
Everything described so far is the manual process, and it's the process that most 3DS Max artists are stuck with when sourcing from general marketplaces, because FBX with Standard materials is simply what most platforms provide.
The Korvix3D 3DS Max Bridge Plugin is built around the specific reality of ArchViz and product visualization workflows. Assets delivered through the plugin arrive with materials already configured for V-Ray, correctly scaled to your scene units, and with texture paths resolved automatically since the plugin manages the texture delivery alongside the geometry.
For an ArchViz artist populating an interior scene with furniture, fixtures, and decor, this means the difference between spending an afternoon on material setup for a dozen assets versus spending that afternoon on lighting and composition, which is the part of the work that actually differentiates a render.
The plugin sits as a panel inside 3DS Max, so browsing the library and importing assets happens without leaving the application or managing downloaded files at all.
Install the Korvix3D 3DS Max Plugin → https://korvix3d.com/download
Browse the asset library → https://korvix3d.com/assets
A Practical Workflow for ArchViz Projects
Putting this together into how an efficient project actually runs:
At the start of a project, identify what categories of furniture, fixtures, and decor the scene needs based on the brief. Source these either through Korvix3D's bridge plugin for instant V-Ray-ready assets, or through general marketplaces if you need something specific the library doesn't have.
For anything sourced as FBX from elsewhere, do the material conversion to V-Ray or Corona once, then save the converted asset into your personal or studio library .max file.
For future projects, check your personal library first. Assets you've already converted are instant. Only fall back to fresh sourcing and conversion for genuinely new categories.
Over time, your personal library becomes populated with the categories you use most often (sofas, lighting fixtures, kitchen appliances, plants), and the conversion overhead shrinks toward zero for the bulk of your typical scenes.
Frequently Asked Questions
Why do imported FBX materials look grey in 3DS Max with V-Ray? FBX files contain Standard or Physical materials, which V-Ray doesn't render with the same accuracy as its native VRayMtl. The materials need to be rebuilt as VRayMtl, with texture maps reconnected to the correct slots, particularly the Reflection Glossiness slot for roughness data, which often requires inverting the roughness map.
How do I fix the scale issue when importing into 3DS Max? Check the Units conversion settings in the FBX import dialog before importing, and set it explicitly to match your scene units rather than relying on automatic detection. If an asset has already imported at the wrong scale, you can rescale it using the Scale tool, but make sure to reset XForm afterward (Utilities > Reset XForm) to avoid issues with modifiers and pivot points.
What's the difference between V-Ray and Corona material workflows for imported assets? The core difference is roughness versus glossiness. V-Ray's VRayMtl traditionally uses Reflection Glossiness, which is the inverse of roughness, meaning roughness maps usually need an Invert node before connecting. Corona's CoronaPhysicalMtl uses Roughness directly, which matches most PBR texture sets without needing inversion, making Corona conversions slightly more direct.
Why are my textures missing after importing an asset into 3DS Max? Texture file paths stored in FBX files are often absolute paths specific to the original artist's computer. Use 3DS Max's Asset Tracking tool (under References) to view all referenced paths and redirect them in bulk to your local texture folder, rather than fixing each missing texture individually.
Is there a faster way to get V-Ray-ready assets into 3DS Max? Yes. The Korvix3D 3DS Max Bridge Plugin delivers assets with V-Ray materials already configured, correctly scaled, and with texture paths resolved, removing the manual conversion process described in this guide entirely for assets sourced through the plugin.


If you work in 3DS Max long enough, you develop a kind of dread around the Import menu. Not because importing itself is hard, but because of what tends to happen afterward. You bring in a chair model for your interior scene, and instead of a chair, you get a grey mannequin sitting in your viewport, surrounded by error messages about missing bitmaps, at a scale that suggests it was modeled for ants or for a building.
This isn't a 3DS Max problem exactly. It's more that 3DS Max sits at the center of the architectural visualization and product rendering world, where V-Ray and Corona are the dominant renderers, and most asset libraries were never built with those specific material systems in mind. The result is a gap between "the file imported successfully" and "the asset actually looks right," and that gap is where most of the wasted time lives.
This guide walks through closing that gap properly, covering the import settings that matter, the material rebuilding process for both V-Ray and Corona, and how to set up a workflow where this stops being a recurring problem on every single asset.
Why 3DS Max Import Problems Feel Worse Than Other Software
Part of this is genuinely about how 3DS Max handles incoming data compared to something like Blender or Unreal Engine, but a lot of it comes down to the kind of work 3DS Max artists do.
ArchViz and product visualization work is judged almost entirely on how convincing the materials and lighting look. A chair with slightly wrong topology might go unnoticed in a final render. A chair with the wrong material setup, flat grey, missing reflections, wrong roughness, will look obviously fake even to a non-technical client. The bar for "good enough" materials is higher in this kind of work than almost anywhere else in 3D.
At the same time, V-Ray and Corona materials are specific node setups that don't exist in FBX or OBJ files. When you import a generic asset, you're getting generic Standard or Physical materials at best, and those need to become VRayMtl or CoronaPhysicalMtl materials before they'll behave correctly under your lighting setup.
Add in the fact that 3DS Max defaults to inches or generic units depending on how it was set up, while a huge amount of asset content online assumes centimeters or meters, and you've got the three classic problems stacking on top of each other: wrong scale, wrong materials, and missing textures, all at once, on basically every import.
Getting the File Format Right Before You Even Open Max
A few minutes of attention before you import saves a lot of cleanup afterward.
FBX remains the most common format you'll find for general assets, and it's reasonably reliable for geometry in 3DS Max. The catch is entirely on the material side: FBX materials come in as Standard or Physical materials with no V-Ray or Corona setup at all.
OBJ is fine for geometry-only situations but brings even less material information than FBX. If you're planning to build materials from scratch anyway, OBJ's simplicity isn't a downside.
3DS Max native files (.max) are the ideal, obviously, but they're rare outside of platforms that specifically cater to ArchViz workflows. When available, they save the entire material rebuilding step because the source artist already set things up in V-Ray or Corona.
GLTF support in 3DS Max exists through plugins rather than natively, and isn't as commonly used in the ArchViz world as it is in game development. For most 3DS Max artists, FBX remains the practical default despite its material limitations.
The honest reality is that for most sources, FBX is what you'll be working with, which means the material rebuild step described later in this guide is something most 3DS Max artists do regularly, whether they've formalized the process or not.
Import Settings That Actually Matter
Importing FBX Into 3DS Max
Go to File > Import > Import and select your FBX file. The FBX import dialog that appears has a handful of settings worth checking every time:
Units is the first thing to look at. Under the Units section of the import dialog, you'll see options for automatically converting based on the file's stored units, or manually specifying a conversion. If your scene is in centimeters (common for ArchViz) and the FBX was exported in meters (common from Blender and many marketplaces), an asset that should be 90cm tall will come in at 9000cm if the conversion isn't applied. Setting the conversion explicitly here, rather than relying on automatic detection, avoids the most common scale disaster.
Geometry options include "Smoothing Groups" and "Turbosmooth," which control how the imported mesh handles smoothing. For most furniture and prop assets, keeping the original smoothing groups from the file gives the best result without extra steps.
Cameras and Lights can usually be left unchecked unless you specifically want the source file's camera setup, which for asset imports is rarely useful and just adds clutter to your scene.
After importing, before doing anything else, select the imported object and check its dimensions in the Object Properties or via the Measure tool. If a chair shows up as 9000 units tall, you know immediately it's a units issue rather than a modeling issue, and you can fix the scale globally (Customize > Unit Setup, or rescale the object) rather than chasing a phantom modeling problem.
Importing OBJ Into 3DS Max
OBJ import in 3DS Max is more straightforward and generally has fewer surprises. Go to File > Import > Import, select OBJ, and the default settings usually bring geometry in cleanly. The companion MTL file, if present, assigns basic material names and sometimes diffuse colors, but nothing close to a render-ready setup.
Rebuilding Materials for V-Ray
This is the step that determines whether your imported asset looks like it belongs in your scene or looks like a placeholder.
When an FBX imports, its materials typically land in the Material Editor as Standard or Physical materials, often named generically like "Material #1" or named after the original file's material slots. The textures, if they came along, are usually still referenced and just need to be reconnected to the right slots in a VRayMtl.
The conversion process, material by material:
Create a new VRayMtl in the Material Editor or Slate Material Editor.
Take the diffuse/albedo texture from the imported Standard material and plug it into the VRayMtl's Diffuse slot.
If a roughness map exists, it typically needs to be inverted to work as a Reflection Glossiness map in V-Ray, since roughness and glossiness are inverse concepts. V-Ray's Output map with the "Invert" option checked, placed between the texture and the Reflection Glossiness slot, handles this.
A normal map goes into the Bump slot, with the map type set to "Normal Bump" rather than a standard bump map, which is a common mistake that results in flat-looking surfaces despite having a normal map connected.
For metal surfaces, the Metalness map (if provided) influences how much of the Reflection color comes from the diffuse texture versus a neutral reflective value. V-Ray's material setup for metalness workflows has improved significantly in recent versions, and using the Metalness slot directly (available in newer VRayMtl versions) is more accurate than manually faking it with reflection color adjustments.
Rebuilding Materials for Corona
The process for Corona follows the same logic with different slot names. Create a CoronaPhysicalMtl, connect the diffuse texture to the Base Color slot, connect roughness (Corona uses roughness directly, no inversion needed, which is one less step compared to V-Ray's glossiness-based workflow) to the Roughness slot, connect normal maps to the Bump slot with Normal Map mode enabled, and use the Metalness slot for metal surfaces directly.
Corona's more straightforward roughness handling (versus V-Ray's glossiness inversion) means Corona material rebuilds are often slightly faster once you're used to the workflow, though both renderers get you to the same visual result with correctly connected maps.
The Texture Path Problem and How to Actually Fix It
Missing texture errors are one of the most common 3DS Max import issues, and the fix most people reach for, manually browsing to each missing file one by one, is also the slowest.
3DS Max has a built-in tool for this that's underused: Asset Tracking (under References > Asset Tracking, or in some versions accessible via the Bitmap/Photometric Path Editor under File > References). This shows every file path referenced in your scene, flags which ones are missing, and lets you redirect them in bulk.
The faster approach: before importing, copy all the asset's texture files into a single folder, then after import, use the Asset Tracking tool to point 3DS Max at that folder once. If the textures use consistent relative paths, 3DS Max will often resolve all of them at once rather than requiring you to browse to each file individually.
For ongoing work, setting up a consistent project folder structure using Customize > Configure User Paths and pointing 3DS Max at a dedicated textures directory for your project means future imports are more likely to resolve automatically, since 3DS Max checks configured paths before reporting files as missing.
Building a Library of Pre-Converted Assets
The material rebuilding process described above is the single biggest time cost in a typical 3DS Max import, easily ten to twenty minutes per asset depending on complexity. The way professional ArchViz studios deal with this isn't by getting faster at the conversion, it's by doing the conversion once per asset and never again.
The practical version of this: every time you import and convert an asset, save it as a 3DS Max scene file (or merge it into a library .max file containing multiple converted assets) with the V-Ray or Corona materials already set up. The next time you need that asset, you use File > Merge to bring it in from your library file, and it arrives with materials intact, no FBX import, no material rebuild, no texture path issues.
Over months of work, this builds into a personal library of assets that are genuinely faster to use than sourcing fresh ones every time, because the one-time conversion cost has already been paid. Many studios maintain shared library .max files on a server specifically for this reason, so the conversion work done by one artist benefits the whole team.
Where Korvix3D Removes This Entirely
Everything described so far is the manual process, and it's the process that most 3DS Max artists are stuck with when sourcing from general marketplaces, because FBX with Standard materials is simply what most platforms provide.
The Korvix3D 3DS Max Bridge Plugin is built around the specific reality of ArchViz and product visualization workflows. Assets delivered through the plugin arrive with materials already configured for V-Ray, correctly scaled to your scene units, and with texture paths resolved automatically since the plugin manages the texture delivery alongside the geometry.
For an ArchViz artist populating an interior scene with furniture, fixtures, and decor, this means the difference between spending an afternoon on material setup for a dozen assets versus spending that afternoon on lighting and composition, which is the part of the work that actually differentiates a render.
The plugin sits as a panel inside 3DS Max, so browsing the library and importing assets happens without leaving the application or managing downloaded files at all.
Install the Korvix3D 3DS Max Plugin → https://korvix3d.com/download
Browse the asset library → https://korvix3d.com/assets
A Practical Workflow for ArchViz Projects
Putting this together into how an efficient project actually runs:
At the start of a project, identify what categories of furniture, fixtures, and decor the scene needs based on the brief. Source these either through Korvix3D's bridge plugin for instant V-Ray-ready assets, or through general marketplaces if you need something specific the library doesn't have.
For anything sourced as FBX from elsewhere, do the material conversion to V-Ray or Corona once, then save the converted asset into your personal or studio library .max file.
For future projects, check your personal library first. Assets you've already converted are instant. Only fall back to fresh sourcing and conversion for genuinely new categories.
Over time, your personal library becomes populated with the categories you use most often (sofas, lighting fixtures, kitchen appliances, plants), and the conversion overhead shrinks toward zero for the bulk of your typical scenes.
Frequently Asked Questions
Why do imported FBX materials look grey in 3DS Max with V-Ray? FBX files contain Standard or Physical materials, which V-Ray doesn't render with the same accuracy as its native VRayMtl. The materials need to be rebuilt as VRayMtl, with texture maps reconnected to the correct slots, particularly the Reflection Glossiness slot for roughness data, which often requires inverting the roughness map.
How do I fix the scale issue when importing into 3DS Max? Check the Units conversion settings in the FBX import dialog before importing, and set it explicitly to match your scene units rather than relying on automatic detection. If an asset has already imported at the wrong scale, you can rescale it using the Scale tool, but make sure to reset XForm afterward (Utilities > Reset XForm) to avoid issues with modifiers and pivot points.
What's the difference between V-Ray and Corona material workflows for imported assets? The core difference is roughness versus glossiness. V-Ray's VRayMtl traditionally uses Reflection Glossiness, which is the inverse of roughness, meaning roughness maps usually need an Invert node before connecting. Corona's CoronaPhysicalMtl uses Roughness directly, which matches most PBR texture sets without needing inversion, making Corona conversions slightly more direct.
Why are my textures missing after importing an asset into 3DS Max? Texture file paths stored in FBX files are often absolute paths specific to the original artist's computer. Use 3DS Max's Asset Tracking tool (under References) to view all referenced paths and redirect them in bulk to your local texture folder, rather than fixing each missing texture individually.
Is there a faster way to get V-Ray-ready assets into 3DS Max? Yes. The Korvix3D 3DS Max Bridge Plugin delivers assets with V-Ray materials already configured, correctly scaled, and with texture paths resolved, removing the manual conversion process described in this guide entirely for assets sourced through the plugin.